Android Seed Project 만들기 2
in Android
Android Seed Project 만들기 2
1편에서는 기본 메인 액티비티에 NavigationTabBar을 추가하고 Iconic을 이용해 아이콘도 추가하였다.
2편에서는 앱의 타이틀바(혹은 액션바) 커스텀과 Fragment를 이용해 페이지를 만들어보자
![]()
Fragment 사용하기
안드로이드에서는 ListView처럼 다수의 콘텐츠를 보여주는 컴포넌트에는 Adapter를 사용해서 구현하도록 되어있다.
Adapter는 기본적으로 내부에 객체를 담는 Collection이 하나 존재한다.
이 Collection의 변화에 따라 Adapter를 사용하는 객체(ViewPager)에서 UI가 변경되는 모습을 볼 수 있다.
public class MainTabPagerAdapter extends FragmentStatePagerAdapter {
    private List<Fragment> fragmentList = new ArrayList<>();

    public MainTabPagerAdapter(FragmentManager fragmentManager) {
        super(fragmentManager);
    }

    @Override
    public int getCount() {
        return fragmentList.size();
    }

    @Override
    public Fragment getItem(int position) {
        return fragmentList.get(position);
    }

    public void setFragmentList(List<Fragment> fragmentList) {
        this.fragmentList = fragmentList;
        notifyDataSetChanged();
    }
    public void addFragment(Fragment fragment) {
        fragmentList.add(fragment);
        notifyDataSetChanged();
    }
fragmentList가 변경되면 UI를 다시 그려줘야하는데 이를 강제로 호출하는 함수가 notifyDataSetChanged 함수다.
Adapter의 notify관련 함수는 다양하게 있으니 도큐먼트를 찾아보도록 하자.
이 Adapter에 추가할 Fragment를 만들어보자
public class SampleFragment extends Fragment{
    public SampleFragment(){

    }
    public static SampleFragment newInstance(){
        return new SampleFragment();
    }

    @Nullable
    @Override
    public View onCreateView(LayoutInflater inflater, @Nullable ViewGroup container, @Nullable Bundle savedInstanceState) {
        View view = inflater.inflate(R.layout.fragment_sample,container,false);

        return view;
    }
}
Fragment는 Android의 액티비티 안에서 존재하는 작은 액티비티라고 볼 수 있다.
간단하게 설명하기를 Android가 처음 나올 때는 모바일 화면이 작아서 액티비티가 한 장의 역할을 했지만,
화면 크기가 큰 모바일 또는 태블릿이 나오면서 액티비티 내부를 세부항목으로 쪼갤 필요가 생겨서 프래그먼트가 생겼다
Fragment는 Activity와 유사한 생명주기를 가지고 있다.
Activity의 onCreate처럼 Fragment에는 onCreateView가 있으며 inflater를 이용하여 화면을 생성한다.
<?xml version="1.0" encoding="utf-8"?>
<LinearLayout xmlns:android="http://schemas.android.com/apk/res/android"
android:layout_width="match_parent"
android:layout_height="match_parent"
android:background="@color/tab_active"
android:orientation="vertical">
<TextView
android:layout_width="match_parent"
android:layout_height="match_parent"
android:gravity="center"
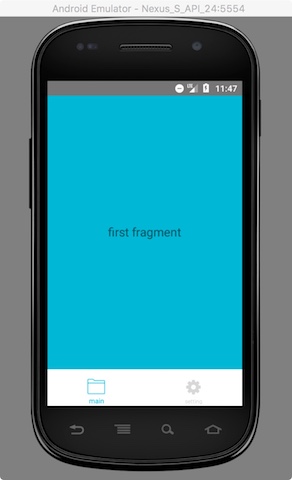
android:text="first fragment"
android:textSize="20dp" />
</LinearLayout>
XML은 아무렇게나 생성해서 activity 처럼 사용하면 된다.
ActionBar 커스텀 하기
기본적으로 Activity에서는 Theme으로 ActionBar를 지원하고 ActionBar에 기능을 넣을 수 있는 함수도 제공한다.
하지만 사용하기가 번거롭고 자유도가 떨어지기 때문에 커스텀을 주로 하는 편이다.
제공하는 그대로 사용하다가 몇시간을 날려먹은 뒤, 커스텀을 주로 사용함
우리는 앱 하단에 탭을 사용하고 그 탭에 따라서 Fragment가 변화하므로
Fragment안에 ActionBar를 커스텀해서 각 화면마다 ActionBar를 두는 구조를 사용한다
ActionBar는 Toolbar를 이용하여 주로 개발한다.
drawable/xml_border.xml
<?xml version="1.0" encoding="utf-8"?>
<layer-list xmlns:android="http://schemas.android.com/apk/res/android">
    <item>
        <shape android:shape="rectangle">
            <solid android:color="@color/prev_color"/>
        </shape>
    </item>
    <item android:top="0.7dp" android:bottom="0.7dp">
        <shape android:shape="rectangle">
            <solid android:color="#ffffff" />
        </shape>
    </item>
</layer-list>
layout/toolbar.xml
<?xml version="1.0" encoding="utf-8"?>
<android.support.v7.widget.Toolbar
    xmlns:android="http://schemas.android.com/apk/res/android"
    android:layout_width="match_parent"
    android:layout_height="45dp"
    android:background="@drawable/xml_border"
    android:theme="@style/CustomTheme">
    <TextView
        android:id="@+id/title"
        android:layout_width="wrap_content"
        android:layout_height="match_parent"
        android:layout_gravity="center"
        android:gravity="center"
        android:text="title"
        android:textSize="15sp"/>
</android.support.v7.widget.Toolbar>
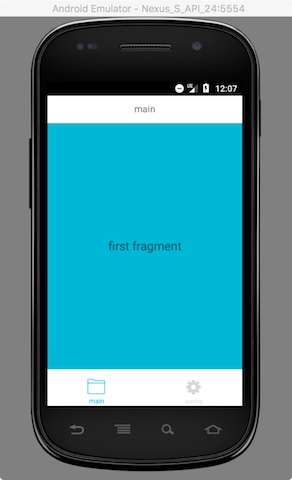
위와 같이 배경이 흰색이고 밑부분에 얇은 선이 그어져있는 툴바를 만들었다.
이 툴바를 이용해 액션바를 커스텀하면 된다.
기존의 fragment에 아래와 같이 include를 이용하여 추가하면 된다
<?xml version="1.0" encoding="utf-8"?>
<LinearLayout xmlns:android="http://schemas.android.com/apk/res/android"
    android:layout_width="match_parent"
    android:layout_height="match_parent"
    android:background="@color/tab_active"
    android:orientation="vertical">

    <include
        android:id="@+id/toolbar"
        layout="@layout/toolbar" />

    <TextView
        android:layout_width="match_parent"
        android:layout_height="match_parent"
        android:gravity="center"
        android:text="first fragment"
        android:textSize="20dp" />
</LinearLayout>
그리고 액티비티에 사용하는 것 처럼 findViewById를 이용하거나 Butterknife를 이용해서 UI를 객체와 연결해서 사용하면 된다
public class SampleFragment extends Fragment{
    public SampleFragment(){

    }
    public static SampleFragment newInstance(){
        return new SampleFragment();
    }

    @Nullable
    @Override
    public View onCreateView(LayoutInflater inflater, @Nullable ViewGroup container, @Nullable Bundle savedInstanceState) {
        View view = inflater.inflate(R.layout.fragment_sample,container,false);
        initToolbar(view);
        return view;
    }
    private void initToolbar(View view){
        if (Build.VERSION.SDK_INT >= 21) {
            // 21 버전 이상일 때
            getActivity().getWindow().setStatusBarColor(Color.BLACK);
        }
        Toolbar toolbar = view.findViewById(R.id.toolbar);
        toolbar.setTitle("");

        ((AppCompatActivity) getActivity()).setSupportActionBar(toolbar);

        TextView title = toolbar.findViewById(R.id.title);
        title.setText("main");
    }
}
이렇게 해서 Tab, ViewPager, Fragment를 이용하여 시작할 수 있는 프로젝트를 간단하게 만들어보았다.
내부 기능은 이제 아이디어에 따라서 추가만 하면 끝!